Tuesday, November 29, 2016
Connecting MYSQL in Spring Roo by Alexies Iglesia
Connecting MYSQL in Spring Roo by Alexies Iglesia
Connecting MYSQL in Spring Roo
Hi, Im not a pro here in Spring Roo but I still want to share my knowledge about connecting MSQL Database in Spring Roo. I made this tutorial for some of my classmates who still cant connect their Roo projects in MYSQL. Thanks to my Instructor, Mam Michelle Macalinao in Web App and to jackiexie who wrote a tutorial about this on her blogsite, Mysterious World . ^_^
This tutorial is intended for all who managed to run their application in localhost but with an error when manipulating values to their database. Be sure that all repository required by your project is already downloaded and running in jetty and Internet for automated downloading of required repository for managing mysql connection in roo. It also requires that you have already your username and password in your localhost of mysql.
So usually your error if you have not yet manage your Mysql connection right is this
Data access failure
Sorry, a problem occurred while accessing the database
1.) First Create your database in MYSQL.
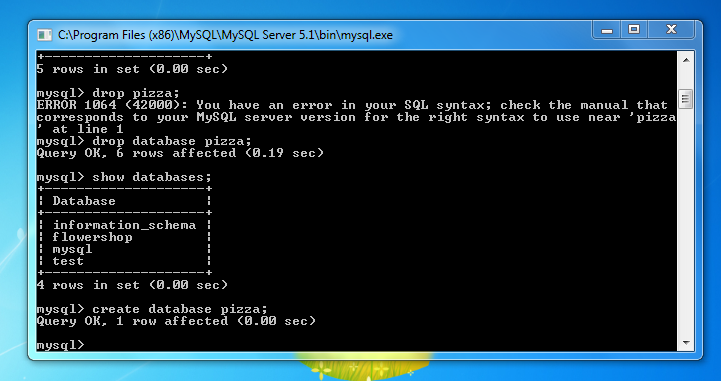
You can create it using Wamp, Command line or in MYSQL Command Line. Do not make any fields since the Spring Roo will automatically make it once the database name was identified.
Currently my database name is "pizza" while my username in localhost is "alex" and my password is "qVaem8WZUQPxEvPj". be sure that the required privelage is granted. You can easily edit your user account in wamp server in phpMyAdmin.
2.) Create Project and Database

Since you Already created a database in MYSQL with a database name "pizza", we can now start in roo.
We will not tackle anything about the coding more than the database, so I will only show the code I used so that you can analyze since i expect that you already know how to manage database using jpa, making entities, fields, relationships and web controllers. I will only discuss things which is related in MYSQL.
First make your directory using command line or manually create it. I made my application inside my desktop so be sure that your your command line is also pointing in desktop if your following me. But you can create where ever you want. Navigate your command line in desktop so that the command prompt will look like this "c:userssystem developerdesktop". Once its ok, you can now code the project and database
code:
mkdir pizzaplanet //making directory of activity
cd pizzaplanet //navigating inside pizzaplanet folder from desktop
roo //opening roo shell
project --topLevelPackage com.aura.pizzaplanet //creating toplevel package
jpa setup --database MYSQL --provider HIBERNATE --databaseName pizza // making database
be sure that the database name you assigned here is the same in the database you created in mysql. You can add username and password of localhot by adding command --username alex --password qVaem8WZUQPxEvPj but I prefer to do it manually buy editing the database connection inside roo soo that you can see where the username and password are configured by roo.
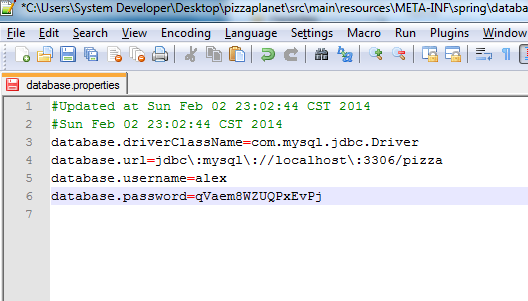
now go to your desktop. You will see the folder you created. Go to src-main-resources-META-INFspring
Open database.properties in notepad (right click - open with - notepad). then insert your localhost username and password like the image below then save and close.
3. Create Entity, Fields Web Controllers and additional commands.
entity jpa --class ~.domain.Topping --testAutomatically //making entities
field string --fieldName name --notNull --sizeMin 2 // making fields
entity jpa --class ~.domain.Base --testAutomatically
field string --fieldName name --notNull --sizeMin 2
entity jpa --class ~.domain.Pizza --testAutomatically
field string --fieldName name --notNull --sizeMin 2
field number --fieldName price --type java.lang.Float
field set --fieldName toppings --type ~.domain.Topping
field reference --fieldName base --type ~.domain.Base
entity jpa --class ~.domain.PizzaOrder --testAutomatically
field string --fieldName name --notNull --sizeMin 2
field string --fieldName address --sizeMax 30
field number --fieldName total --type java.lang.Float
field date --fieldName deliveryDate --type java.util.Date
field set --fieldName pizzas --type ~.domain.Pizza
web mvc setup //making web files
web mvc all --package ~.controller //making controllers
exit //exit from roo
mvn jetty:run //running in localhost


Thanks you. ^_^
Go to link Download